

Is it better to paint or replace cabinets?
I was admittedly a slacker this summer, especially given I didn’t come remotely close to tackling the list of projects I had planned. In fact, I only completed one. It was a good one, though, and it may help some folks decide which is best for them: painting or replacing aging cabinets. Before I share details of my project, here are my thoughts on what you may want to consider when deciding which direction to take.
Weigh Your Options
First things first. Consider the condition of your current cabinets. If the cabinets are in decent shape and the layout works in the room, painting may be the best choice. Paint can transform dull, old cabinets into vibrant and amazing looking cabinets in no time. On the other hand, new cabinets may be the way to go if your existing cabinets are falling apart or the layout doesn’t work well for you. New cabinets will allow you to change the look entirely and replace structurally damaged cabinets that no amount of paint can fix.
Next, ask the ever-important question of how you’re going to pay for this undertaking. The cost to paint cabinets is considerably less than replacing them — from a couple hundred dollars if you do it yourself and between $3,000 to $5,000 if you hire a professional. New cabinet costs average between $6,000 to $18,000 or more, and a full kitchen remodel averages between $60,000 and $125,000 depending on the level of renovation you do.
Lastly, you’ll want to consider what you want your cabinets to look like. If you’ve decided to replace your cabinets, you’re starting with a blank canvas where the options are endless, and your local retailer can help you through this process. If you’ve decided to paint your cabinets, you’ll need to decide on a finish. Do you want cabinets where color soaks into the wood and enhances its natural beauty? Or do you want a modern, smooth painted look? You can hire a professional to repaint your cabinets for you, or, if you’re like me, take the project on yourself. It’s not as hard as you may think.
Painting Cabinets
I have a few kitchen and bathroom cabinet makeovers under my belt. While I would never consider myself an expert, I do have experience with different cabinet makeover methods, particularly re-staining, painting, and outright replacing them. I’ve been happy with the end results of all methods I’ve used, though I do have a favorite. And, in case you haven’t figured it out yet, the project I took on this summer was, yep, painting cabinets using a tried-and-true method.
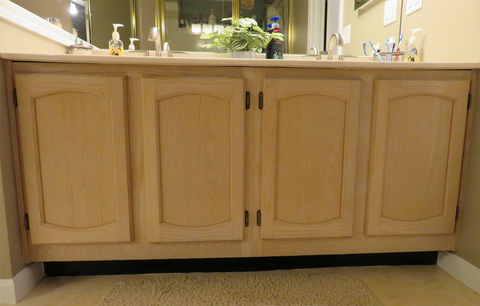
These bathroom cabinets were in nearly perfect condition. The color, not so much: light colored and tired looking. There wasn’t a need to spend a lot of money on new cabinets, so the technique I use was ideal for a fresh, modern look that would allow the natural beauty and wood grain to show.
My first steps were to prepare the cabinets for painting by stripping off all the old stain and varnish. In past projects, I’ve used liquid stain removers for large, complex cabinets. These cabinets only had four doors, so I used good old fashion sanding for this project.

Here’s a list of supplies used to sand the doors and cabinet fronts.
- Handheld finishing sander
- Medium grade sandpaper for door and cabinet fronts (actual wood)
- Very-fine grade sandpaper sheets for thinner backsides of doors (i.e., fiberboard)
- Scissors to cut sandpaper sheets

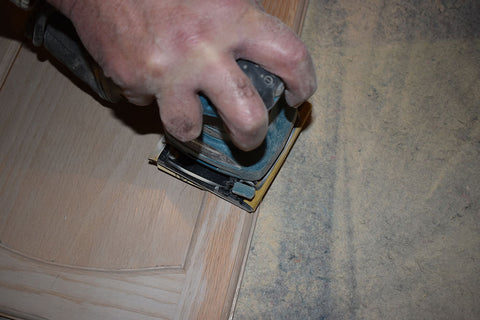
And for those of you who are wondering, I do NOT have hairy knuckles or man hands. I put my husband to work and that’s him in the pics. He later confessed to committing the egregious act of pushing too hard on the sander — a definite area of caution. The pressure eventually rounded the prominent edging on the cabinet face. Thankfully, there was an easy fix by sanding all edges to have the same rounded finish. To the naked eye, no one would be able to tell there was a flaw — only me and that nagging voice in my head that will always remind me that it’s there (sigh…).
After stripping the cabinets, I wiped them down with a towel and warm water. I let the set over night to make sure that they were dry and ready for painting.

I chose a latex, semi-gloss paint for this technique, which is what I recommend since it’s more forgiving and easy-to-clean up. I used a deep brown color, though any color will work. The process doesn’t require a lot of paint. It took less than 8 ounces of paint to complete this project.
To create the mix, I combined two parts paint to four parts clear mixing glaze in a disposable plastic container that would seal tightly between coats. While any brand will work, I used Valspar brand paint and glaze for this project. To measure, I used a cap from a small aerosol can of shaving cream. The measuring cap from a bottle of cough syrup also works great.
I started with the back of the doors first in case I didn’t like the color. It’s much better to re-sand and start over on the part of the door least visible and seen in the room.
With each door propped on painter tripods and armed with disposable latex gloves, I put a thin coat on the back of the doors using a paint brush. I used a small, inexpensive brush (nothing fancy). I don’t recommend disposable brushes for this since those brushes saturate too easily.
A thin, thin, thin coat is key here. You’ll want to make sure that each coat feels and looks like you’re dry brushing the paint on. The first coat will look like total garbage. That’s normal. Let each coat try overnight before adding the next coat (and be sure to re-stir your mix between coats). As you move through the process, the coloring becomes richer while still allowing the wood grain to show.

These pictures show a door with its first coat, and one compared to a door on its fourth coat. I ended up putting five coats altogether on all sides. Then, after letting them dry for a couple of days, I added two coats of satin finish polyurethane to protect the paint and give is a low gloss finish.
There was no need to remove cabinets to finish the facing. This part of the process was the easiest and quickest because of the smaller area to finish. Using the hand sander, the finish on the cabinet front was removed just as it was for the doors. (Note this can kick up quite a bit of dust in the house, so I recommend closing off the room and covering up hard-to-dust items.) After sanding was done, I followed the same process to paint and polyurethane the cabinet fronts.
The result of this cabinet painting project was amazing and at a cost of less than $100. The cabinets now have a stain-like finish produced with paint, and the wood grain show beautifully. And new hardware gives it that extra pop for a fresh, modern look. The pictures don’t do it justice.


I hope this article and how-to details were a helpful starting point for anyone considering a cabinet makeover. I wouldn’t let cabinet painting intimidate you, especially if you use this foolproof, very forgiving technique. There’s nothing that you can’t fix. If you run into a snag, you can always sand and start fresh. If the color you pick looks terrible, repaint it.
While this process is a bit time-consuming, there are huge cost benefits and beautiful results in the end. Good luck! And feel free to drop me a note with questions or comments below.
So now that we’re in the midst of fall, I have several projects lined up for the coming months.


I found another gem while on a trip to Hocking Hills, Ohio this summer. I came home with this little guy. He and his new older brother will need a little more space in the laundry room. That’s their designated eating area, so I’m going to do a quick makeover in that room.
Also planning to add texture to a plain glass door in the dining room, adding a closet organizer to my closet, and starting on a minor kitchen remodel that includes painting all the cabinets.
I hope you’ll join me for these stories and more in the coming months. Until then, enjoy and stay safe.


